Getting Started
Learn the essential steps to begin in MyEmma, including reviewing brand standards, using templates, and more.
The Basics
Marketing professionals across campus are responsible for representing The University of Mississippi appropriately through their email communications. With our audience continually growing and diversifying, staying updated on the latest email practices is key to effectively engaging and connecting with our community.
Before you start building emails, make sure your content:
- Engages members of the Ole Miss and Oxford Community
- Promotes university-wide news, activities, events, and/or educational opportunities
- Increases awareness and reach of campus groups and departments to the student body, alumni, potential students, and other respective audiences.
- Supports the mission of the University of Mississippi
Templates
Templates simplify campaign building by saving time and offering an on-brand starting point. This way, you can spend more time creating meaningful content and less time on design.
Emails that don’t align with brand guidelines or accessibility standards will be rejected during the review process, so it's better to get it right from the start!
Premade Templates
"Ole Miss Script": This template is shared with most sub-accounts and can be used as a jump-starter template. It comes preloaded with colors, fonts, and the Ole Miss script logo.
"Clean & Simple": This template is specific to each sub-account and includes a unique university approved logo, such as a school, department, or organization/club lockup. It also includes a custom footer with an address, email, social media, and phone number specific to the sender.
Request a Custom Template
If you're planning on sending emails regularly, we recommend you request a custom template. The template we provide includes a header with your lockup and a footer made specifically for your account. It also comes with the correct fonts and colors preloaded.
Before you fill out your custom template request, make sure you have the following information close by:
- Your university approved lockup in JPG or PNG format
- Physical address
- Email address
- Phone number
- Social media handles or links
Brand Guidelines
Visual Elements
When creating emails, every visual choice you make—from selecting images to picking colors—directly influences how the Ole Miss brand is perceived.
- Logos, Colors, Fonts, Images & Videos, and Graphic Elements

Written Content
Create emails with clear, powerful headlines that properly reflect the Ole Miss brand personality.
- Brand Personality, Voice & Tone, and Storytelling Approaches
5 Steps to Send Your First Email
- .csv (UTF-8 encoded only)
- .xls
- .xlsx
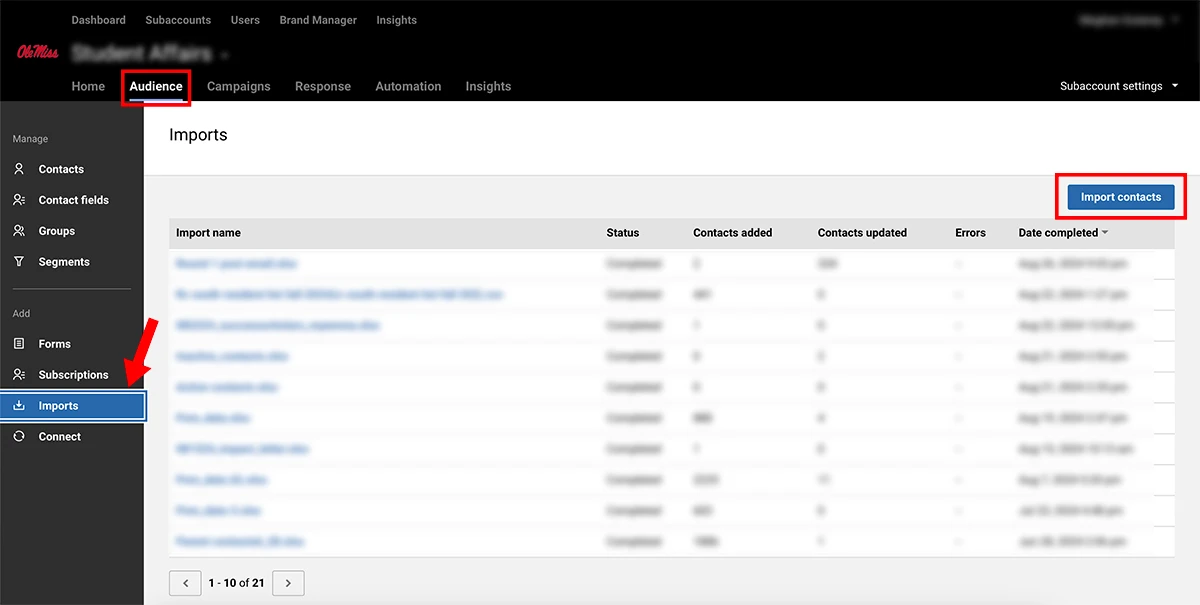
Import Contacts From a File
- Go to the Audience section in your account
- Click "Imports" in the left menu
- Click the "Import contacts" button on the right side.
- Follow the on-screen instructions to upload your file and assign contacts to a group.
To create a new campaign, start by navigating to the Campaigns tab, and then follow these steps:
- Go to Emails in the left panel.
- Click "Create New Campaign" on the right

- Select "Regular Email"
- Give your campaign a name (e.g., "August Newsletter | Campus Recreation"), and click "Continue."
- Choose a Template or start from scratch using the drag-and-drop editor.
- University templates that meet branding requirements are in the "Shared Templates" section of the left menu.
- For recurring emails, request a custom template from the Web Content team, which will also appear in "Shared Templates" once created.
*Important Note: Remember to periodically save or click on elements in the top gray bar to reset the 50-minute inactivity timer and avoid being logged out.
Content
The Content tab contains all the blocks for building your campaign. Each block has its own settings for padding, alignment, and more. You can add, remove, copy, or move these blocks, and the right-side panel will automatically update to show the settings for the selected block.
Types of Blocks
- Title, Paragraph, and List Blocks: Drag these blocks from the right panel into your email. Use the blue text toolbar for text formatting and the Content Properties panel for block settings like font size and alignment.
- Image Block: Drag the Image block into your campaign. Click "Browse" to select or upload images. Use the Content Properties panel to edit the image, adjust alignment, add alternate text, and more.
- Button Block: Drag the Button block into your campaign. Customize text, font, colors, and alignment using the text toolbar and Content Properties panel. Link the button to a webpage, email, phone number, or SMS.
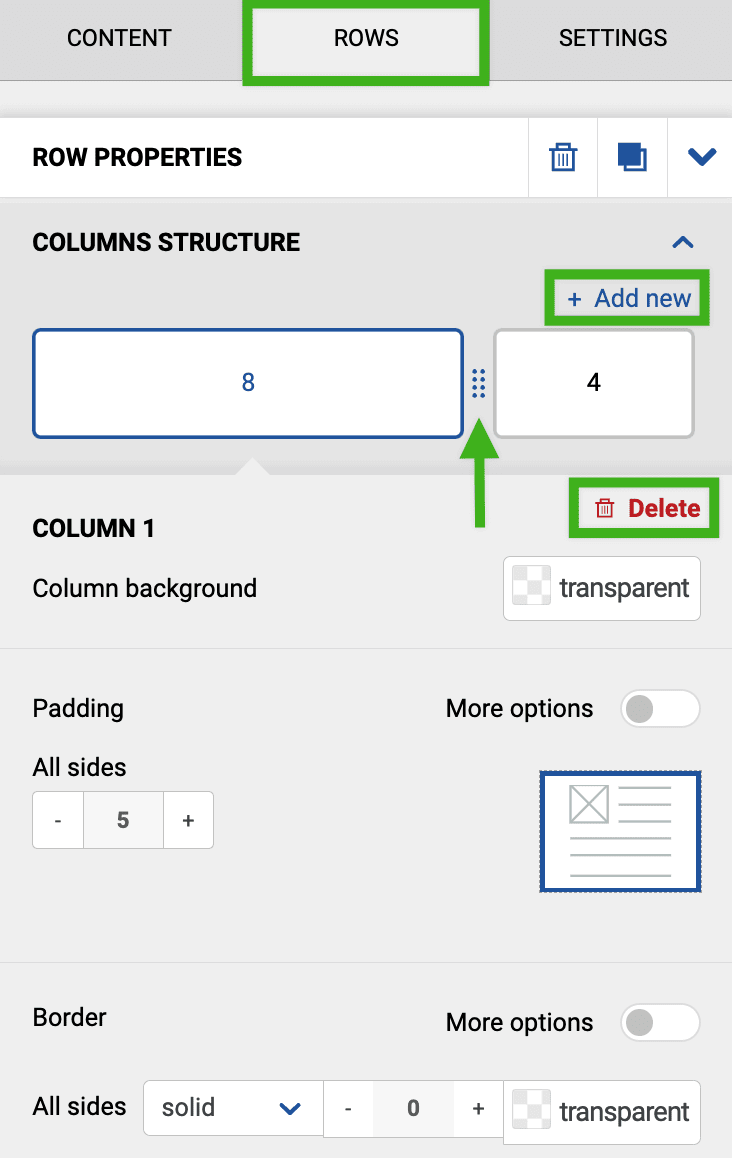
Rows
Your campaign is built with rows, each of which can contain 1 to 6 columns. You can create campaigns using a single row or multiple rows, and customize each row with varying numbers of columns.
- To resize a column, click on the dots between that column and its neighbor in the Row properties panel and drag it from side-to-side until the two columns reach the desired size ratio.
Settings
The Settings tab allows you to define the default design for your campaign, including font family, size, weight, and color. You can also adjust alignment, padding, and borders. These settings apply to the entire campaign.
Before Hitting Send...
Review the Pre-Send Checklist here.
Scheduling Your Email
You can make changes before the scheduled send time, but remember that once the email is sent, it cannot be recalled or edited.
- Click the "Review" button at the top right.
- Confirm the selected audience, subject line, and preheader text.
- Select group(s) to send the email to.
- Type your subject line.
- Add preheader text. This improves email preview in inboxes.
- Verify sender and reply-to details.
- Click "Schedule for later" and choose a future send time. ALWAYS schedule at least 2 hours in advance or a few days in advance for weekend emails to ensure time for the Web Content Team to approve.
Web Content Approval
If your email requires Web Content approval, a designated member of the team will review the email for alt text, branding, and other details. If everything checks out, they'll approve the email for sending at the scheduled time.
If there are issues, they’ll provide feedback for corrections. Once fixed, the Web Content team will re-review and approve the email for release.
Response Tab
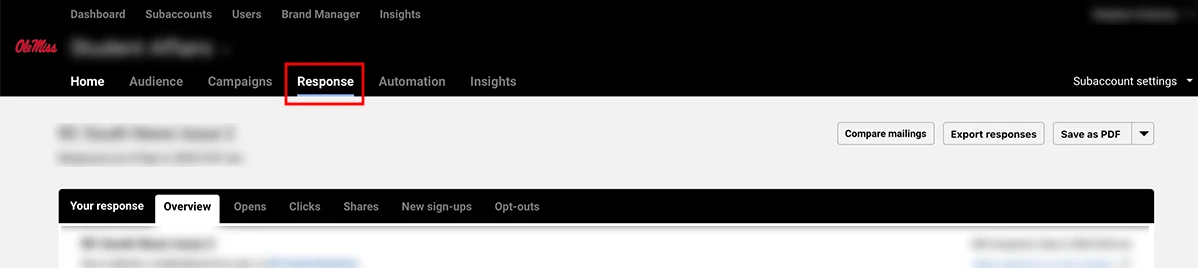
The Response tab in MyEmma is your go-to place for tracking the performance of your email campaigns. Here, you can view key metrics like delivery rates, open rates, and click rates, giving you a comprehensive overview of how well your emails are resonating with your audience.
Most marketing emails are opened within the first 48-72 hours after the email was sent, so it's expected that the bulk of your response data will fall within that time. However, those totals will continue to adjust even after the 48-72 hour window.
Understanding Email Metrics
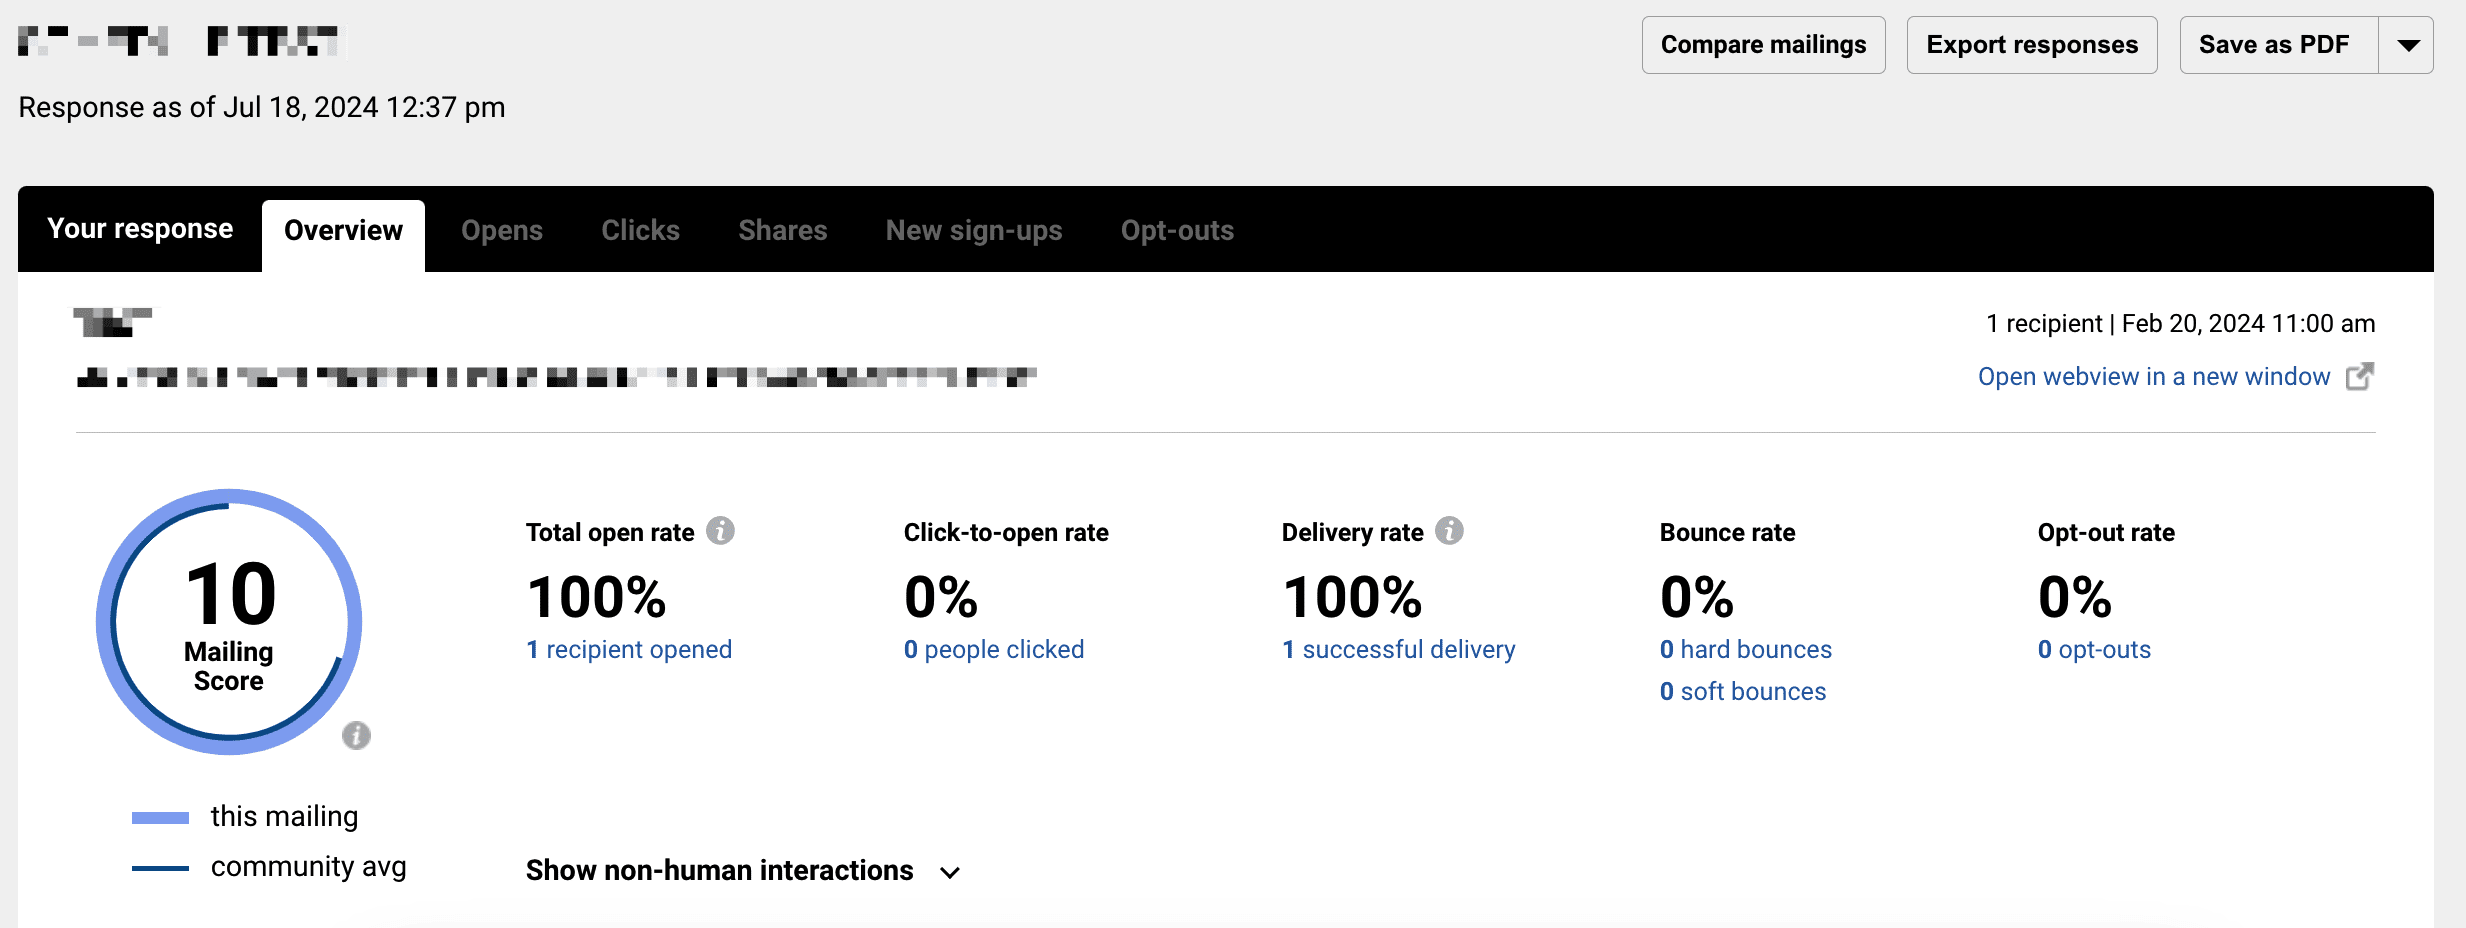
Open Rate
Opens refers to the number of people who opened your campaign in a trackable way. The open rate is calculated by dividing the total number of emails opened by the number of emails that were successfully delivered.
Clicks
Clicks refers to the number of unique clicks and total clicks in your campaign. Unique clicks exclude members clicking the same links multiple times; whereas total clicks account for multiple clicks.
- Use the Click Analysis and click for a map view of click patterns or switch to List view for a detailed, link-by-link breakdown of clicks.
Still Need Help?
Whether you're working in Cascade, MyEmma, or the Event Calendar, the Web Content team is here to help you get your message out there.