Uploading Files
Learn to properly upload files to Cascade
Properly Uploading Files to Cascade
Uploading files to Cascade isn't as simple as saving files to your desktop. Cascade is a shared workspace, for one. Because of this we need to be mindful not only of how uploading files to Cascade operates in the backend, we also need to follow certain standards to make our uploaded assets easy to understand and identify.
This page will cover:
If you'd like to take a deep-dive, check out our Frequently Asked Questions
How to upload files to Cascade
Uploading files to Cascade came seem easy at first, but there are a few things you have to keep in mind so that you don't create problems for users in the future.
- One of the first things you should remember is that there are some files that may need to change overtime. For example, a student handbook may only be good for a year. If your digital asset has a shelf life, it may be best to store it on box (or another service) and link it from your page. Then when the file needs to change, you change the file, and the link stays the same. Easy peasy.
- While it is possible to upload files into the backend of Cascade rather than through the modules that will hold the files themselves, we recommend uploading files through the modules themselves to make sure your images are properly cropped and look good on the page as you build it out.
But if you have images (or other digital assets) that can stick around, look good, and fit the module you'd like to use, you're in the right place.
Uploading files to Cascade
There are a number of ways you can start the upload process through a WYSIWYG or a listing, for instance. For the sake of this page, we'll focus on uploading an image to the Checkerboard module.
Here's the step-by-step:
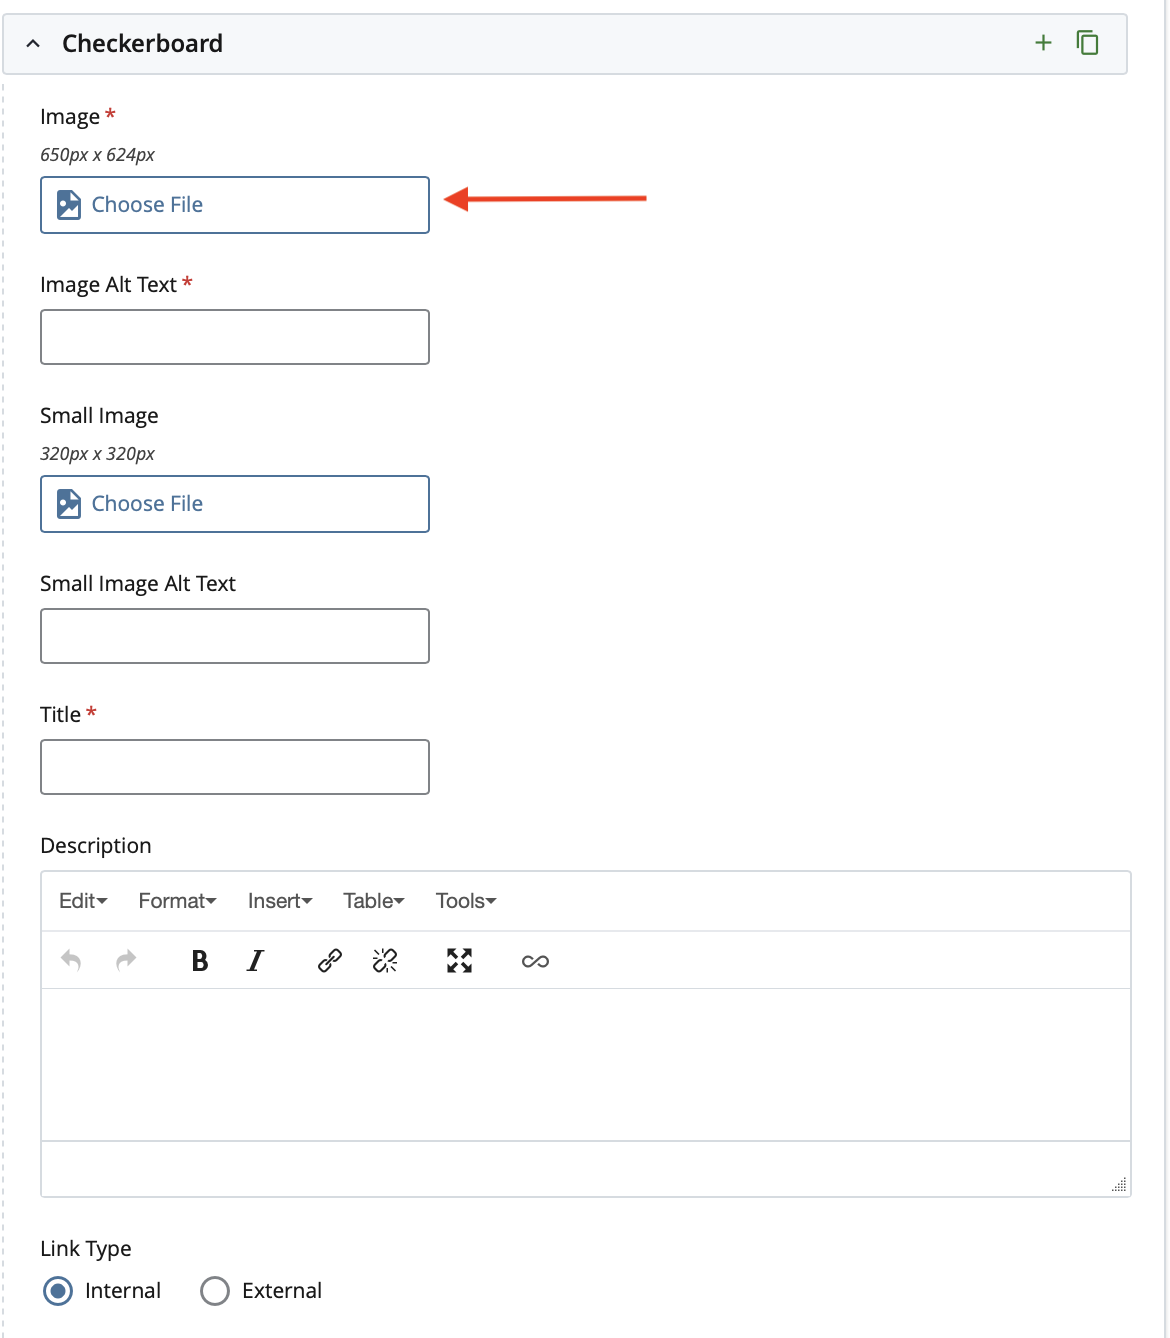
- When you find the area of the module that allows for you upload an image, click "Choose File" to start the selection or upload process. (Note that for many modules there will be a size requirement for the image--these are usually listed just above the "Choose File" button.)
- Once you initiate the image selection/upload process a navigation the "Choose a File" window will appear on the right side of your screen. This window will allow you select images that are already uploaded to Cascade and upload images that exist elsewhere (e.g., your computer).
If you are selecting a photo that is already in Cascade you can simply browse and search for the photo via title or folder in which it is held.
If you are uploading a photo click the upload button and then click "choose" and a new window will open on your computer allowing you select the proper file and start the upload process.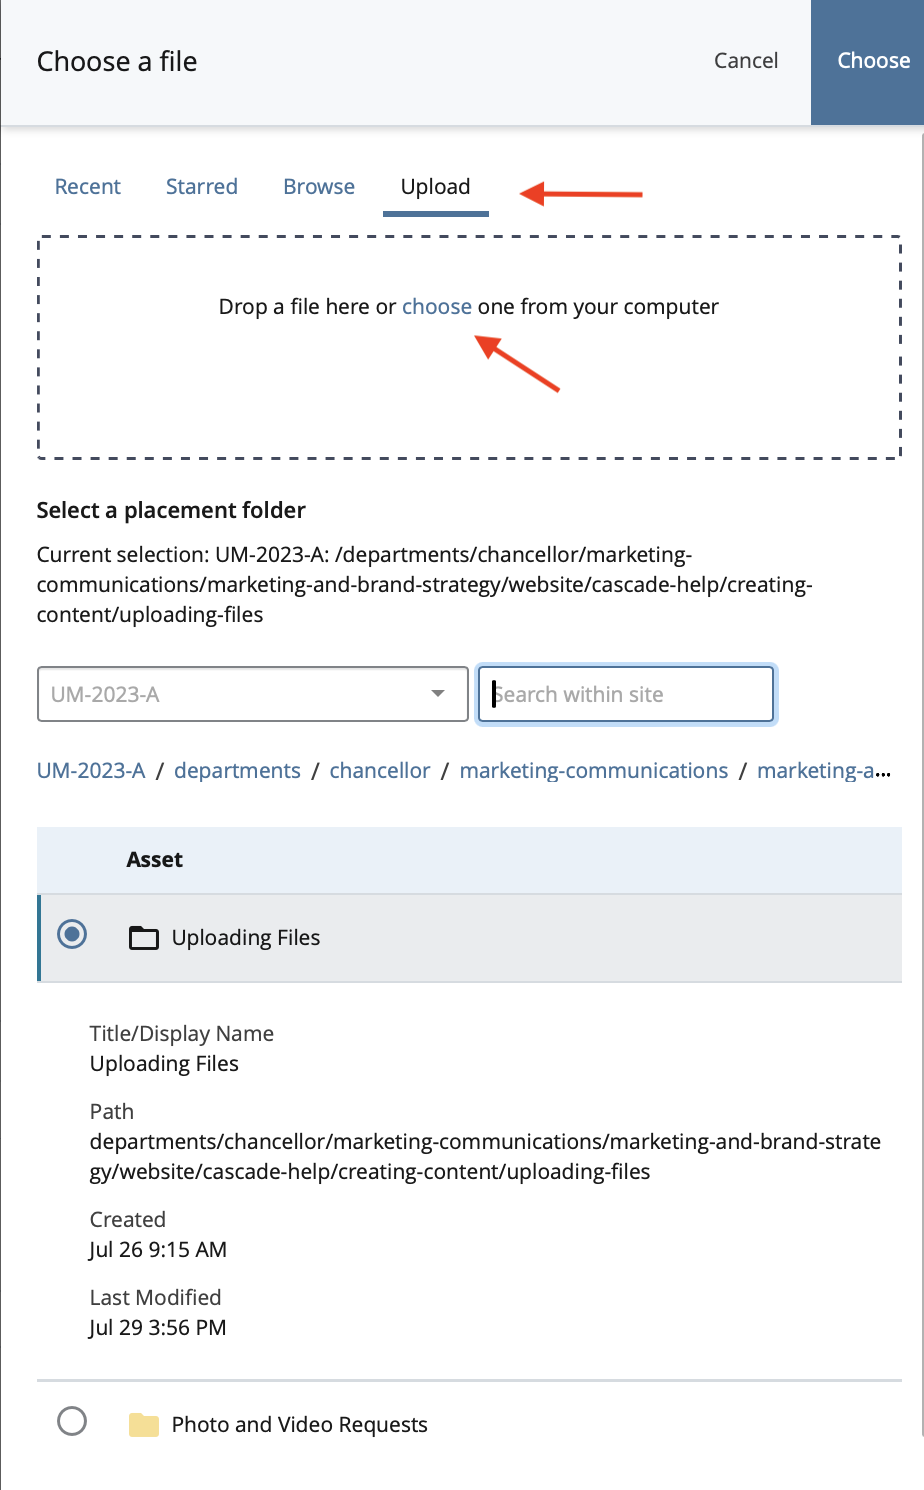
- Before you select the "Choose" button at the top of your "Choose a file" window, make sure that your file is going to the right place. To do this, take a look at the Assets Folder and make sure that the folder and page you want the image to show up on is chosen.
You can navigate to a new folder by either clicking through the hyperlinks in the page pathway or you can use the asset tree in the "Choose a file" window.
SEO is extremely important in almost every aspect of a webpage. One of those places for SEO that get overlooked are the file names for photos. Luckily, if you optimize a file name for search engines, you can also optimize it for users at the same time.
Here’s what you should keep in mind when prioritizing SEO for file names:
- Include relevant keywords. Integrate keywords that describe the image content. Search engines can potentially use these keywords to understand and index your images for relevant searches.
- Focus on the page's content. Tailor the keywords to the webpage's content where the image will be used.
- Start with the most important keywords. The first few words in the filename are most heavily weighted by search engines, so put the most relevant keywords first.
- Match filename to alt text. For optimal SEO, consider aligning the keywords in your filename with the image's alt text description.
Organization doesn’t just help now, but it also helps us in the future. Whenever we have to look for files or figure out what they mean, the file name is going to be the first thing we see.
Here are some organizational rules to keep in mind:
- Use hyphens as separators. Separate words with hyphens (-) for readability. Avoid using underscores (_) as some website management systems might interpret them differently.
- Keep it concise. Aim for filenames under 60 characters to avoid potential display issues on web pages.
- Consider a dating system (optional). If dealing with a large number of photos, including the date in YYYYMMDD format at the beginning can be helpful for sorting, especially for images from the same event.
When it comes to organization you want to prepare for the worst version of yourself (or a peer) pulling up to their computer (e.g., tired, grumpy, or under a deadline).
Do them a favor and make everything easier by being clear and precise.
Keep the following in mind:
- Simple and understandable. Focus on clarity for anyone viewing the file name, not just yourself.
- Avoid overly creative names. Skip overly creative or technical terms that might not be clear to everyone.
- Use lowercase letters. Lowercase is universally recognized and avoids potential issues with different systems.
Here's an example combining the elements listed above.
- Original photo name. "DSC_1234.jpg" (unhelpful)
- Improved name. "ba-underwater-basket-weaving-hero-image.jpg" (so much more helpful)
This improved name incorporates relevant keywords ("underwater basket weaving," is clear and concise, and uses hyphens for separation.
PDF's generally hold time-sensitive information.
From CVs to student handbooks, that information is going to change at some point. Instead of having to remember when the info becomes stale, then finding and uploading a new file into Cascade, and then relinking that file so all links now lead to the fresh PDF, you should store the file on a third party site, update it there and keep all links the same.
If you are the collecting type, preparing for future events, it's best to use a third part, like Google or Box to store and organize your files.
- Cascade isn't a storage unit, it is a functioning CMS that holds olemiss.edu. We need to make sure that we keep it as neat and organized as possible.
This also means that as files are no longer needed (e.g., an old photo is replaced with a newer one) they should be deleted from the backend.
Still Need Help?
Whether you're working in Cascade, MyEmma, or the Event Calendar, the Web Content team is here to help you get your message out there.